You can start the Transfer Wizard:
The process is the same in both cases. Use the Organization page to transfer more than one Team Member at a time. Images in this section show a transfer of two Team Members and follow selection of the Transfer button on the Organization page.
-
To start the Transfer Wizard, select Transfer.
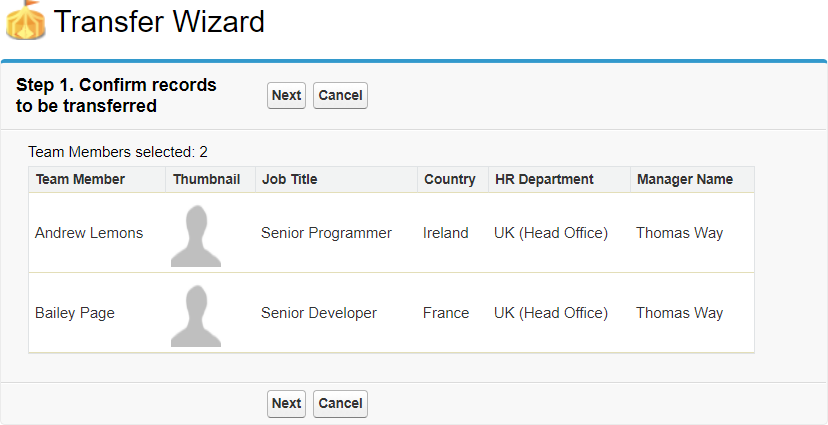
Sage People displays step 1 of the Transfer Wizard:

-
Check you selected the correct Team Members. Select:
-
Next to continue with the transfer.
-
Cancel to return to the Home page and change your selection. The filters are cleared and the complete list of Team Members redisplayed.
Selecting Next displays Step 2 of the Transfer Wizard:

If future dating is not enabled, the Job Effective Date step is not displayed.
-
-
Enter the date you want to transfer to take effect.
-
Select today's date to the right of the field if you want the transfer to be immediate.
-
You can select a future date if future dating has been configured for Team Member transfers. Select the field to display a date selector.
Select:
-
Previous to step back through the Transfer Wizard.
-
Next to continue with the transfer.
-
Cancel to return to the Home page and change your selection. The filters are cleared and the complete list of Team Members redisplayed.
Selecting Next displays Step 3 of the Transfer Wizard:

-
-
Check the transfer date is correct. If the Team Members are transferring to:
-
A new HR Department: select Department Lookup
 , find and select the destination department.
 -
A new manager: start typing the new manager name to display a shortlist of matching names, then select the destination manager.
Select:
-
Previous to step back through the Transfer Wizard.
-
Next to continue with the transfer.
-
Cancel to return to the Home page and change your selection. The filters are cleared and the complete list of Team Members redisplayed.
Selecting Next displays Step 4 of the Transfer Wizard:

-
-
Check all details are as you want them.
Select:
-
Previous to step back through the Transfer Wizard.
-
Update to commit the transfer.
-
Cancel to return to the Home page and change your selection. The filters are cleared and the complete list of Team Members redisplayed.
Selecting Update completes the Transfer Wizard. Sage People displays a confirmation message:

...and a confirming email is sent to the address associated with your User. The email confirms the number of Team Members to be transferred and includes the Job ID of the transaction.
NoteIf the email is not received, ask your Sage People Administrator to check the status of the Trigger Action Email field on the Employment Record. If set to Change, the email is not sent. The field must be reset to Start.
On completion, if Job History is enabled a new Job History record is created for each Team Member who has been transferred.
-