-
Go to Setup > App Setup > Create > Objects.
-
Scroll down to find the HR Notice object and select the Label.
Sage People displays the Custom Object Detail page.
-
Go to the Page Layout section and select Edit for HR Notice Layout.
-
Select Fields in the left panel of the HR Notice Layout selector.
-
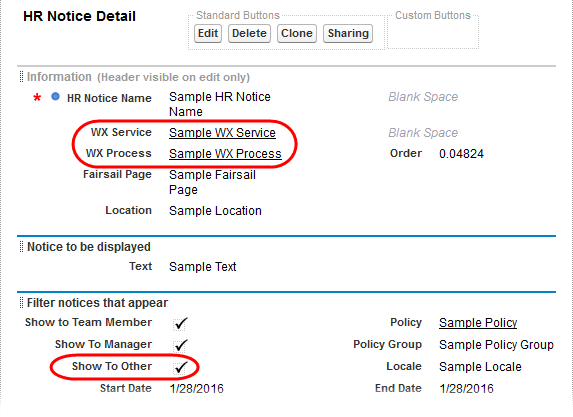
Drag and drop the three fields WX Service, WX Process and Show To Other on to the HR Notice Sample layout.
Suggested locations:
-
WX Service and WX Process immediately below HR Notice Name.
-
Show To Other below Show To Manager in the Filter notices... section.

-
-
Select Save.
Next time you display or refresh HR Notice Detail or HR Notice Edit pages, the new fields are included in the display.