WX Portal | Configure upload of team member photos
There are several ways to add team member profile photos to Sage People:
-
Team members can upload their own profile photos in the WX portal
-
HR managers can upload photos to the Team Member record
-
Upload photos in bulk using an email service.
Uploading photos in WX
Granting Team Members the ability to upload their own photo is configured at policy level. When granting this access, keep in mind that photos are immediately available upon load and there is not the capability of going through an approval process.
To grant access for Team Members to load their own photos, there are two steps to be followed. Confirm the Work Details Service is Active and Configure the Policy to allow Team Members to upload photos.
Confirm the WX Work Details process is active
- Navigate to WX Services and in List View Select All; Select the Work Details Service Name

- Within the service Select Work Details WX Process Name

- Select Edit
- Select the Active box and select Save

Configure the Policy for Team Members to Upload their photos
- Navigate to the policy you want to edit, and select the policy name.
- Select Edit
- In the Team Member section, select Modify Photo:

- Select Save
To confirm the Team Member can upload their photo:
- Log in as a user with a Team Member profile who is in the policy you have edited.
-
Navigate to Work Details, and select Edit.
-
Select Upload File.
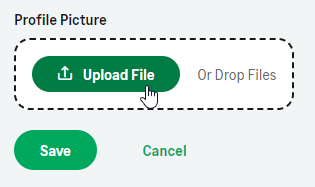
- Navigate to the file that is to be uploaded and select the file.
- Select Save, then refresh the screen to see the updated photo in the user's profile menu. Tip
When selecting the WX Photo on the policy, the field is automatically placed in the Work Details Service of WX. The field does not need to be added to the field set on the Team Member object.
Upload photos in the HR Manager portal
To upload photos on an individual basis, follow the below steps:
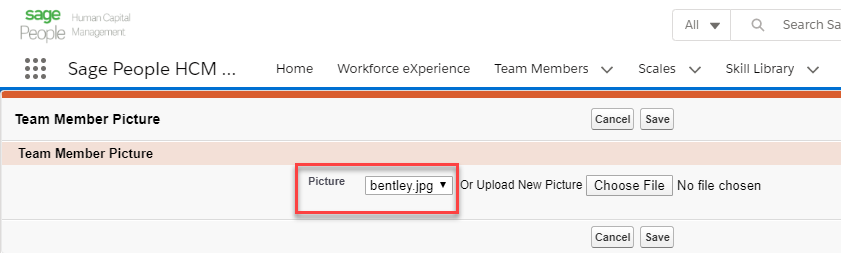
- Navigate to the Team Member Record and select Change Picture:

- Select the photo that is to be uploaded.
- If there is a current photo in the file, this will be displayed:
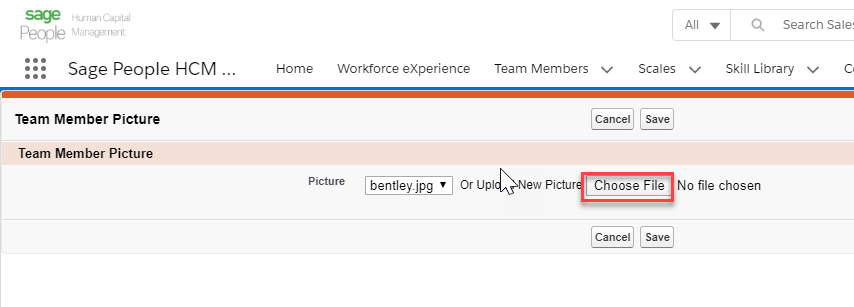
- If you are adding a new photo; select Choose file and browse for the file:
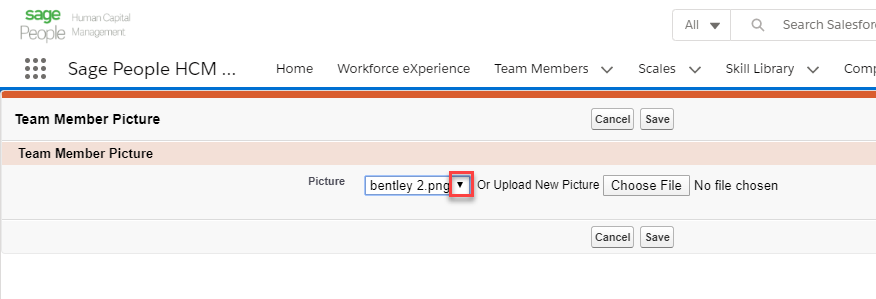
- If there is more than one photo attached to the team member and you want to select one to use, open the drop-down menu to select the correct photo:
- If there is a current photo in the file, this will be displayed:
- Select Save
HR upload using an email process
To upload the photos in bulk directly to Team Member records, this can be done through a standard Salesforce email service. Before using this function you must configure the email service.
For instruction on configuring the email service, see Emailed attachments and photos.
Import pictures
Send an email to the newly created email address. The subject and text of the email is ignored.
Any attachments must be pictures of type jpg, png, gif or tiff.
The name of each file must be the exact name of the team member or their unique ID with the extension of the file appropriate to the picture type.
Individual pictures should not be greater than 200KB.
- The name of the picture file must be the same as the Unique ID of the Team Member.
- Up to 50 files can be attached to a single email, with a maximum size of 10MB for the email and all attachments.
- Individual file size for each photo is a maximum of 200KB.