-
In the HR Manager Portal select the Team Members tab.
-
On the Team Members Home page, select New.
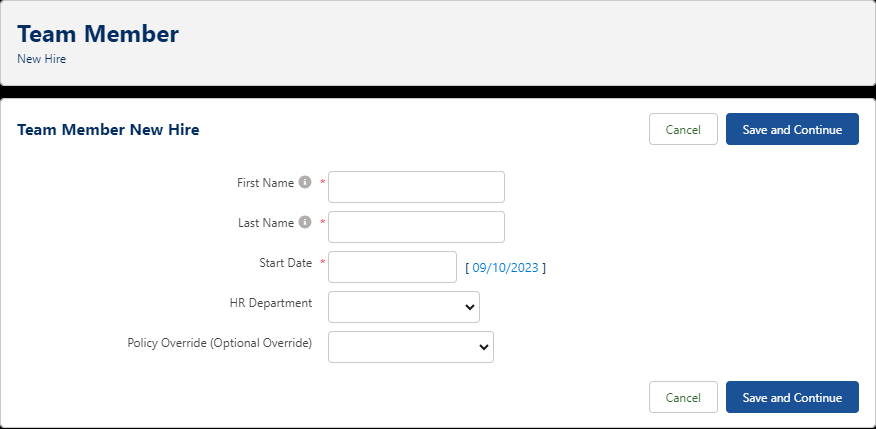
Sage People displays the Team Member New Hire page:
-
Complete the fields as follows:
Field Description First Name Mandatory. Text, up to 80 characters. The team member's given name.
Last Name Mandatory. Text, up to 80 characters. The team member's family name or surname.
Start Date Mandatory. The date the team member's employment is to start. Select today's date to the right of the field, or select the field to display a calendar, then choose the Start Date.
HR Department Mandatory. Picklist, showing the departments you manage. HR departments you do not manage are not listed. Select the picklist and choose the HR department hosting the new team member. The department sets the HR manager and policy for the team member.
Policy (Optional) Optional. Picklist. To override the policy linked to Department, select the picklist and choose the policy you want to apply to this team member. -
Select Save and Continue to create the basic team member record and continue with the New Hire process.
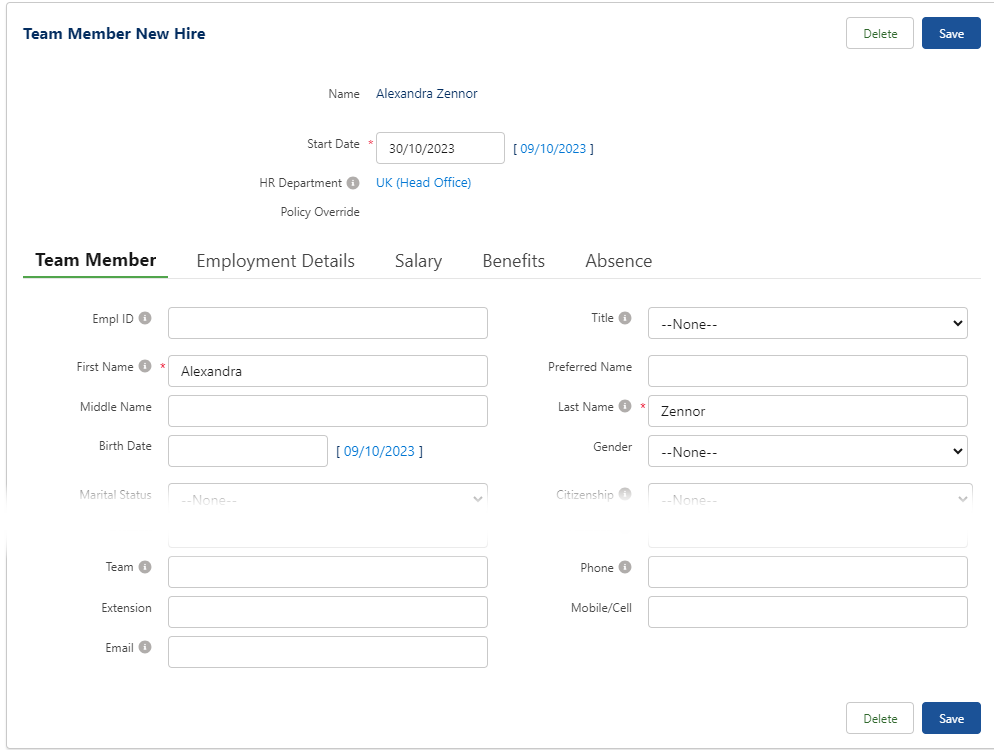
Sage People displays the Team Member tab on the Team Member New Hire page:
-
Team Member, Employment Details, Salary, and Benefits tabs use existing field sets to control content, so the fields you see depend on the field sets.
-
Complete the fields you need to add detail to the new team member records.
-
To delete all your entries including the basic team member record at any stage of the process, select Delete. You are asked to confirm:
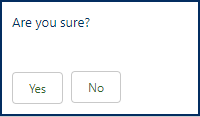
Select Yes to delete the new hire.
-
If you enter dates that are incompatible, for example, a salary start date that is before the employment start date, Sage People displays a warning:

You can Confirm that the dates are as you intend and continue the process, correct the date(s) and then Confirm, or Delete the complete record.
If the warning relates to the Continuous Service Date and you change the date before confirming, select Save and then Confirm again to create the team member.
-
-
On the Team Member tab:
-
You can edit the Start Date, First Name, and Last Name you entered on the first page.
-
You cannot change Policy or Department.
Team members link to a policy through an HR department. To set a different policy or department for the new hire, delete the new hire and start again.
-
-
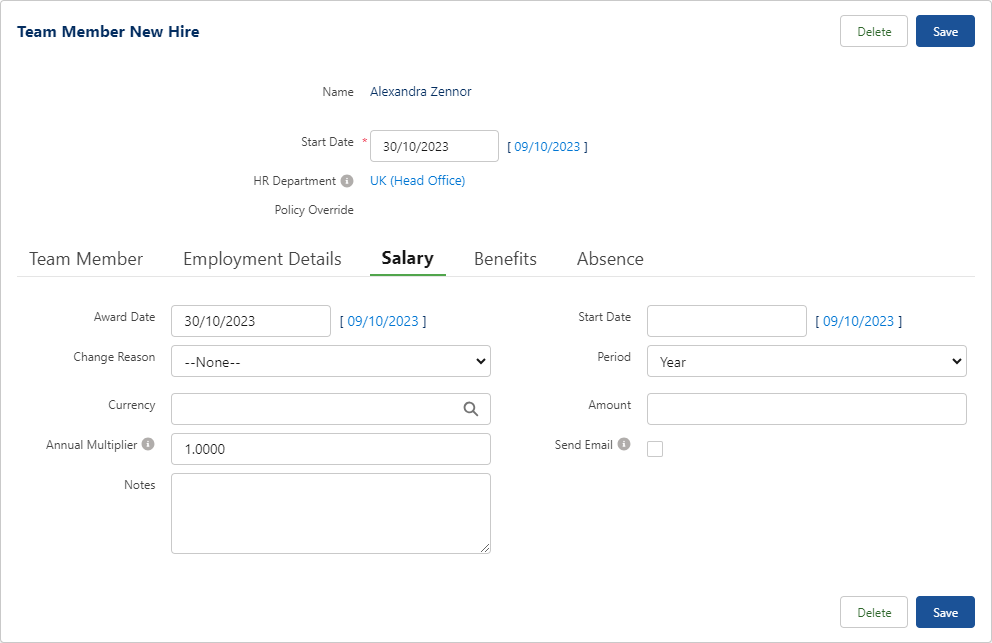
On the Salary tab:
-
If you enter a value in Currency, Amount, or Annual Multiplier, you must enter values in all three.
-
-
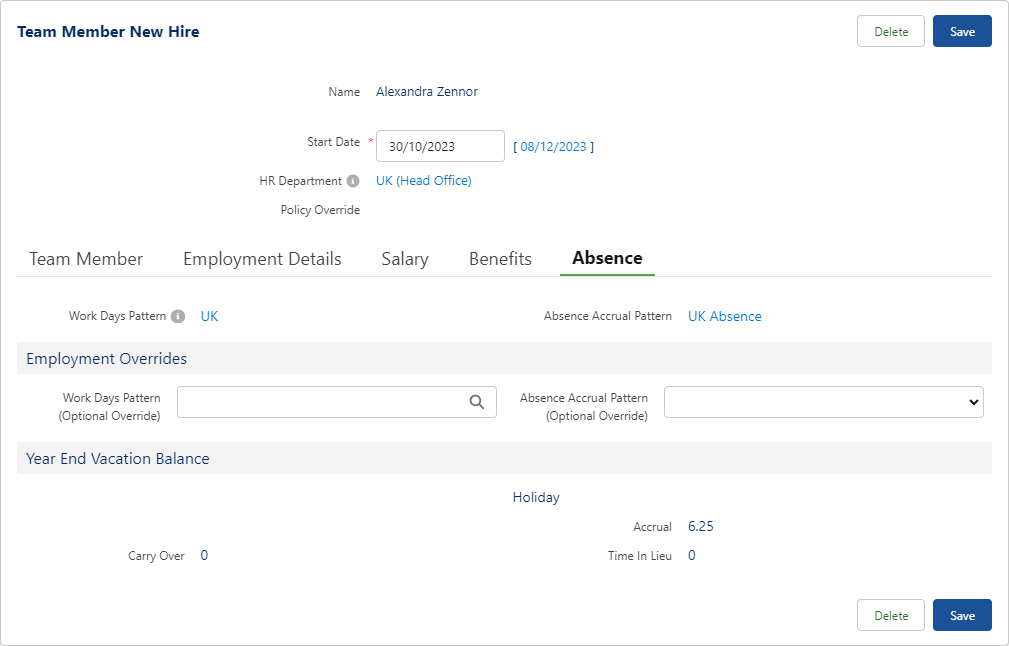
On the Absence tab:
-
Amending the Start Date recalculates and redisplays the Year End balances to give an accurate pro-rata value.
-
You can use the Work Days Pattern (Optional Override) lookup to search for and select an alternative work days pattern. The default is taken from the policy associated with the department selected, or the policy override provided, on the first page.
-
You can use the Absence Accrual Pattern (Optional Override) picklist to select an alternative absence accrual pattern. The default is taken from the policy associated with the HR department selected, or the policy override provided, on the first page. Changing the absence accrual pattern recalculates and redisplays the Year End balances in line with the associated absence accrual rule(s).
-
Amending the Continuous Service Date, FTE, or Hours Worked values on the Employment Details tab recalculates and redisplays the Year End balances.
-
-
Select Save.
The new hire records are created with the values you entered.
