As a manager with direct reports, you can create new employment details changes in People Management Workflow in WX. People Management Workflow is also known as the HR Requests process in the Team section, or as Employment Change Requests. Your administrator can choose what name they give to this process.
Sage People Y23.1 and Y23.3 releases enabled more people to create employment change requests:
-
Managers with cross reporting Team Members can now initiate an employment change request if they have Edit access as a cross reporting manager, and the cross reporting manager type has access to the People Management Workflow process. This applies to all cross reporting manager types—Manager, Supervisor, Mentor, or Project Manager.
The Y23.3 release removes the requirement for the cross reporting manager to have direct reports of their own to be able to access People Management Workflow.
-
Managers can now initiate employment change requests to the direct reports of their own direct reports.
To create a new employment change request:
-
In the Team section of the menu, select the People Management Workflow process (Employment Change Requests in the screenshot):
 Note
NoteYou can also access the team view of the process from your My Team menu.
WX displays the employment changes summary page.
-
Select New:

WX displays the request types available in your organization:

If there are no request types available in your organization, WX displays a message "You do not have any HR Request Types defined".
-
Select the type of request you want to make.
WX displays the fields for the request type.
- Complete the details for the request:
For Select a team member, enter one or more characters to search box to see names of your direct reports. You can use first names, preferred names, and full names.
The search finds your direct reports, your cross reports for whom you have Edit access, and the direct reports of your direct reports.
Select the team members.
You can search multiple times. The selected team members are added below the search box:

The maximum number of team members in one request is 10.
-
Enter the other details of the employment change in the other fields in the request. The fields displayed are those selected by your organization and can be configured to match the needs of each request type.
If your administrator has included an amount field and a percentage field for a salary change or a bonus request, you need to choose which field you are using before you can enter a value:

After you have selected an option, the related field is available for entry. If the same request type includes two amount and percentage fields for both salary and bonus, both field selectors are displayed first, then followed the fields in the request type.
Required fields are marked with a red asterisk after the field label:

You must complete these fields before you can submit the request.
If you select multiple Team Members, the same changes apply to each team member - you cannot start one request and supply different details for each Team Member.
-
If your organization enables you to attach a file to the request, WX displays the Attachments field:

Select Upload File to choose a file to attach, or drag and drop a file to the area bounded by the broken line.
You can attach one file per request.
When you have selected or dropped a file, WX displays the file name and a Delete button. Select Delete if you need to change the file you have added.
The maximum size for a file is 2.2MB.
-
Select Next.
WX validates the values you have entered against any validation rules defined by your administrator, and checks for an active approval process in your org.
-
If required, WX displays the error, for example:


You need to address the issue before you can continue. If you see the error about the approval process, contact your administrator.
-
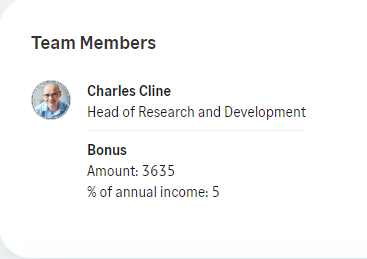
If the validation checks found no issues, WX displays the details of the changes you are requesting, and the current values of those fields, for each team member:

If you requested a salary or bonus increase using a percentage, the amount is calculated from the team member's annual salary and displayed for you to review:
If you entered a percentage but no calculated amount is displayed, the possible causes include:
-
Your organization's bonus request type does not contain the Salary Amount field. It is required for the bonus percentage calculation to work. Your administrator can add it to the request type.
-
The request is for a team member who does not have an active salary record. You can enter an amount instead, or contact your HR team for advice.
-
-
-
Review the changes. You can select:
-
Back to return to the Details view to change the details or add or remove team members.
-
Submit Request to initiate the request using the details you have entered. WX saves the request, sends it to the first approver, and redisplays your People Management Workflow summary page.
-
Cancel to return to your People Management Workflow summary page if you decide not to go ahead with the request at this time.
-
If you added an attachment, the file name to download the attachment.
-