The Employment Status picklist stores values you can assign to an employee, such as Active, Contractor, Future Leaver, Left. The assigned value can be used to control Team Member visibility and access to processes. Values can be translated into other languages. The Employment Status picklist is a field on the Team Member object.
With Administrator access you can edit the values in the picklist, changing names, adding or deleting values, changing the display order and setting a default value.
If you change the default values in the Employment Status picklist, ensure the value for employees who have left your organization does not include all or part of the value used for active employee status.
To edit the picklist:
-
Go to the object manager:
-
In Salesforce Lightning Experience, go to Setup > Object Manager,
-
In Salesforce Classic interface, go to Setup > App Setup > Create > Objects.
-
-
In the list of objects, select the Team Member Label.
-
In Salesforce Lightning Experience, select Fields & Relationships.
-
In the list of Team Member Custom Fields, select the Employment Status Field Label.
-
Scroll down to the Values Related List and select New to add a new value to the picklist.
Sage People displays the Add Picklist Values page.
-
In the text box add the values you want, one per line.
For example, to add a status value for Pre Boarders, enter:
Pre Boarder
-
Select Save.
The Values Related List is redisplayed with the new value(s) added to the end of the list. The order of values in the list is the order used when the picklist is displayed.
To change the order:
-
Select Reorder.
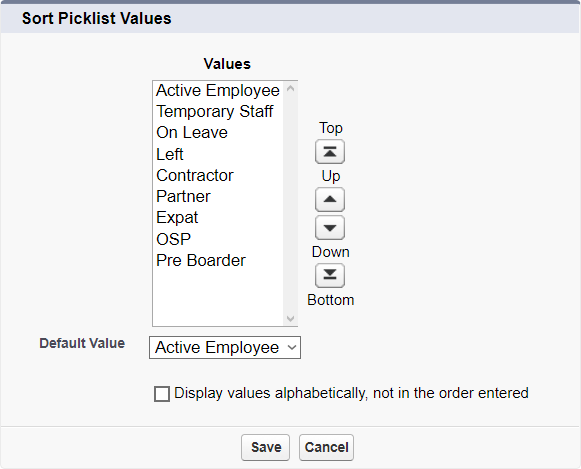
Sage People displays the Picklist Edit page:

-
Select a Value or Values you want to reorder and use the Top
 , Up
, Up  , Down
  , and Bottom
  buttons to move them.
You can also set the Value to appear as the default in the picklist, and choose to display all Values alphabetically.
-
When you have finished reordering the list, select Save.
The Values Related List is redisplayed with the Values reordered.
-