When you create a WX Report, all fields from the underlying report are made available and displayed in the WX Report Fields Related List on the WX Report Detail page:
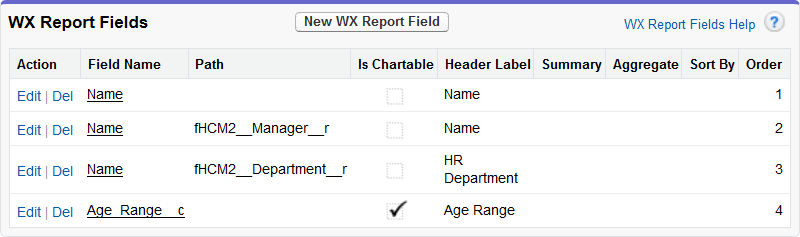
Is Chartable
When the WX Report is first created, included field types are assessed to see if they can be plotted on a chart. Chartable fields are then marked as Is Chartable on the WX Report Detail page, WX Report Fields Related List:

If the Is Chartable column is not displayed, you can add it to the layout:
- On the WX Report Detail page, select Setup, and then Edit Object.
- On the object details page, select Page Layouts from the left sidebar, and then select the layout you want to edit.
- On the WX Report Layout page, select Related Lists in the left panel.
- On the WX Report Fields Related List, select Properties

- In the list of Available Fields select Is Chartable and Add it to the list of Selected Fields. Move the field to the position you want it to take in the Related List layout.
By default, all numeric and date fields, including Id and Count, are marked as Is Chartable.
When adding new fields to the WX Report, or selecting Edit for a field listed in the WX Report Fields Related List you can change the Is Chartable setting, but bear in mind:
- Checking the box does not enable fields to be charted if they are not of a chartable type. For example, marking a text field Is Chartable does not enable the data it contains to be charted. Checked fields are still assessed for to see if they are chartable.
- If nofields on a report are marked Is Chartable, all fields are treated as potentially chartable. Numeric and date fields are then taken in the order specified by the Order column, and the first chartable field found is used for Pie and Doughnut charts.
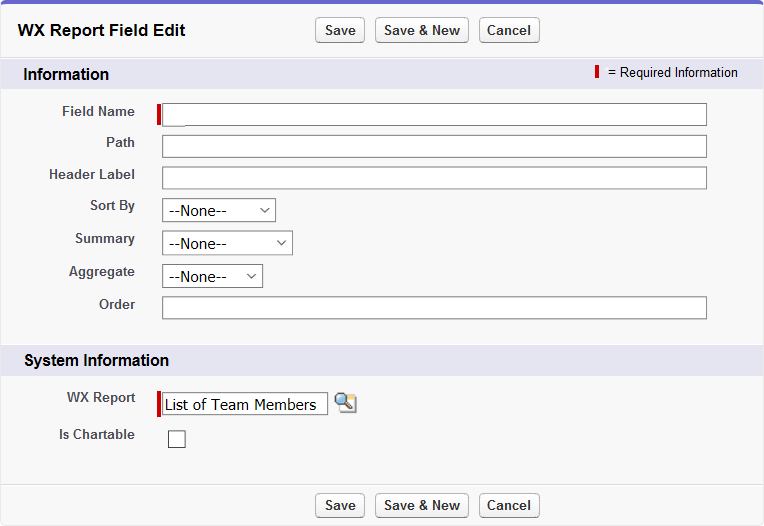
To add a new field to the WX Report:
- Select New WX Report Field.
Sage People displays the WX Report Field Edit page:
-
Complete the fields as follows:
Field Description Field Name
The API name of the field.
Path
The path followed to access the field, from the report's Base Object.
For example, if the report's Base Object is:
-
fHCM2__Benefit__c
The path to locate the Full Name field in the Team Member object would be:
fHCM2__Employment__r.fHCM2__Team_Member__r
There are some limitations on Path, imposed by the nature of the relationships between some objects:
-
For fields on the Team Member object, set Path to fHCM2__Employment__r.fHCM2__Team_Member__r
-
For fields on the Employment Record object, set Path to fHCM2__Employment__r
-
For fields on the Salary object, set Path to fHCM2__Current_Salary__r
Header Label
The label used as a column head in the WX table report and as a legend in WX charts.
Sort By
An indicator - ascending or descending - against the field used to apply a sort order to the data.
Summary
If this is a Summary field, the field type. Select the picklist and choose from:
- Value
- Day
- Day in Month
- Week
- Quarter
- Month
- Month in Year
- Year
Aggregate
For Summary reports and if this is an aggregate field, the field type. Select the picklist and choose from:
- Sum
- Maximum
- Minimum
- Average
- Count
Order
A number representing the display order of the field. Low numbers to high numbers are displayed left to right as report columns and chart legends.
-
-
Complete the fields in the System Information section as follows:
Field Description WX Report
The name of the WX Report hosting this field. Defaults to the name of the WX Report you are editing.
To add this field to a different WX Report, select WX Report Lookup
 , find and select the WX Report you want.
Is Chartable
Checkbox. Check to ensure this field is included in WX Report charts. You can chart numeric fields - checking Is Chartable for non-numeric fields has no effect.
-
Select:
- Save to save your changes and return to the WX Report Detail page.
- Save and New to save your changes and add another new WX Report Field.
- Cancel to discard your changes.