In the menu, select the Timesheets process:

WX displays the Timesheets page. Select Current:

WX displays the Timesheet for the current pay period:
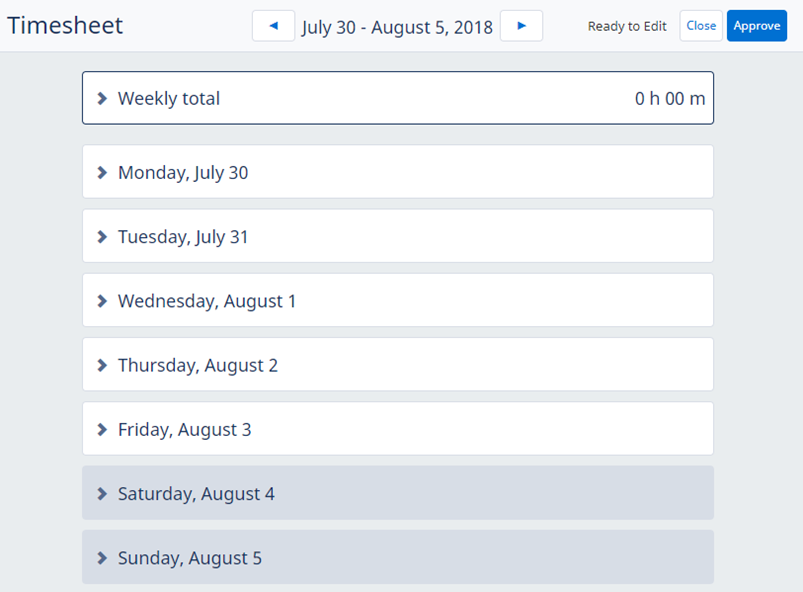
Select a day to open time entry for that day.
The types of time entry field depend on how Timesheets have been configured for the Team Member.
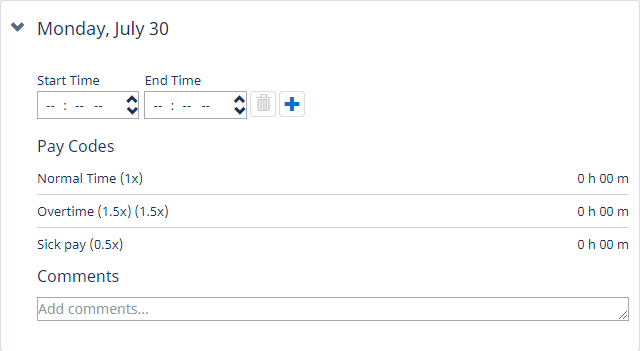
This example shows time entry by start and end time:
-
For Total Time entry:
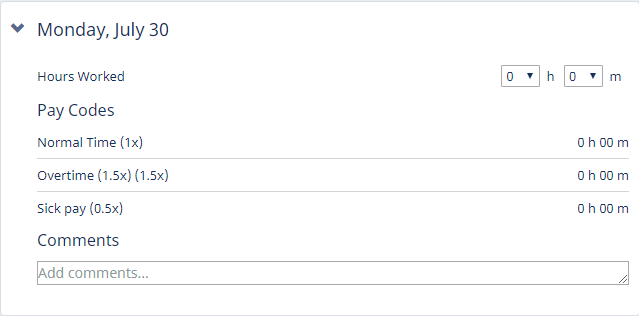
The Timesheet displays time entry fields for the total time worked during the day, in hours and minutes. Pay codes are displayed below the entry controls and time logged against each pay code automatically updated as your entries are saved.
-
For time entry by Start-End Time and by combined Start-End Time and Hours Worked:

The timesheet displays Start Time and End Time fields for the initial time period in your working day. Locale settings determine if times are entered using 12 hour clock or 24 hour clock. For timesheets with multiple time periods, when you complete time entry for a time period, additional fields are available for the next time period. Select
 to add another period:
WX displays fields for the next available time period:

The number of time periods available is controlled by configuration options. Typically, each period represents a shift. Pay codes are displayed when different rates of pay apply to different times of the day, or to times of the day and hours worked. As you complete the timesheet, your time is automatically assigned to the appropriate pay codes.
-
For time entry by Pay Code:
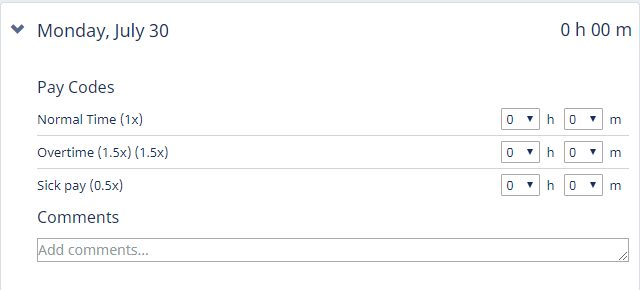
The Timesheet displays time entry fields in hours and minutes for each pay code. For example, 8 hours Normal time and 2 hours Overtime.
-
For time entry by Work Allocation:
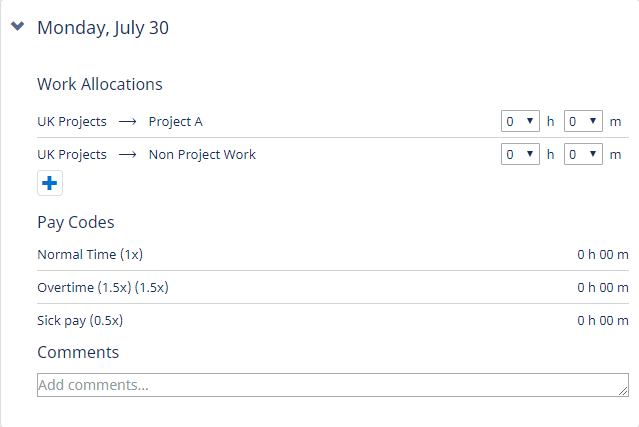
The timesheet displays time entry fields in hours and minutes for each project, customer, or other classification that may apply to you. It may be configured to enable you to select from a list of available projects:
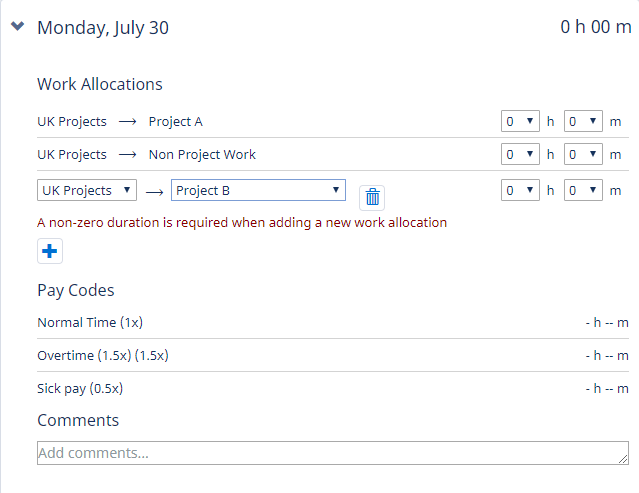
When you have added a Work Allocation to a timesheet, that Work Allocation is automatically available for time entry on the following timesheet. If you do not enter time against the Work Allocation on the following timesheet, the Work Allocation is dropped from subsequent timesheets. The Work Allocation is retained as long as time entries are made against it.
The timesheet may also display any pay codes that apply to you. As you complete the timesheet, your time is automatically assigned to the appropriate pay codes.
Enter your hours worked in the time entry fields.
When you complete each time entry, Sage People saves them automatically when you navigate away from the entry or after 10 seconds of inactivity.
Selecting another field or button, or closing the timesheet also confirms your time entry.
-
If you make a mistake in time entry and want to correct it after confirming, set the value to 0 or if available, select
 to delete the complete entry, then re-enter.
Timesheets in progress display Submit and Close buttons:
![]()
-
Close saves any time entries you have made and keeps the timesheet in the Not Submitted tab.
Select Edit for the timesheet to reopen it for new time entry or to correct entries you have made:

You can continue to edit a timesheet until you select Submit.
-
Submit sends the timesheet for approval to your manager and moves it to the Submitted For Approval tab. You can view submitted timesheets but not edit them.
To reopen a saved timesheet:
-
Navigate to the Timesheet Detail view and select the Not Submitted tab:

-
For the timesheet you want to reopen, select Edit:

WX displays the timesheet for you to add or change entries.
-
You can change saved time entries until you select Submit.
-
Totals are automatically recalculated when Sage People auto-saves.
-
To delete a time entry, set the value to 0 or select
 where available.
-
-
When you complete the timesheet, select Submit.
Submitted timesheets:
-
Are sent to your manager for approval.
-
Have a Submitted For Approval date added to the Detail view.
-
Are moved from the Not Submitted tab to the Submitted For Approval tab.
If your manager rejects a submitted timesheet:
-
The Submitted For Approval date is removed.
-
The timesheet is moved from the Submitted For Approval tab to the Not Submitted tab.
-
Make any changes necessary and select Submit again.
Approved timesheets:
-
Have an Approved date added to the Detail view.
-
Are moved from the Submitted For Approval tab to the Approved tab.
To view time entries on an approved timesheet, select View:
