Understand how to add the longlist component to the Vacancy Lightning page and display it for an active vacancy in Sage People.
Searching for people to fill vacancies typically starts with a broad field of candidates, progressively filtered to identify the best fit. Sage People now supports a candidate longlist of prospects to fill a vacancy. The longlist is an intermediate stage between initial search results and a candidate shortlist. This feature integrates with AI Matching.
Display the longlist for an active vacancy
-
In Recruit, select the Vacancies tab.
-
On the Vacancies home page, select the Vacancy Name.
-
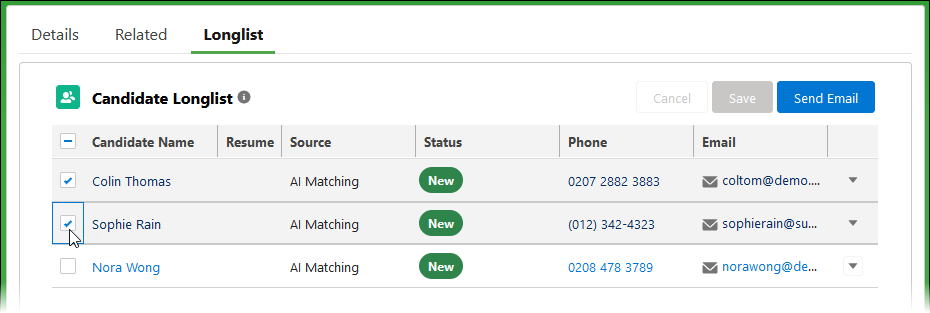
On the Vacancy page, select the Longlist tab.

Sage People displays the Longlist.

The Longlist indicates candidate status. Default values are:
-
New
-
Contacted
-
Not interested
To customize status values, edit the Status picklist on the Vacancy Longlist object.
You can sort the Longlist by Candidate Name or by Status.
-
Hover on the column heading to display the sort order:

Select to change the order.
You can also display the Longlist using the link on the Candidate Search page:
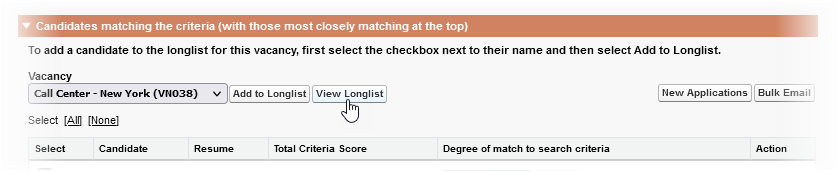
To add candidates to the Longlist, use the AI Matching search results page or the Candidate Search page.
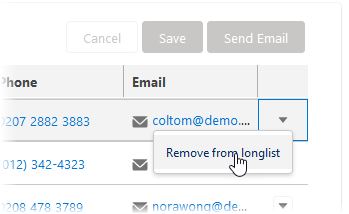
To remove candidates from the Longlist, select the picklist at the right of a candidate row. Choose Remove from longlist:
To contact candidates using the email address held for them:
-
Select one or more candidates using the checkbox at the left of a candidate row to activate the Send Email button:
-
Select Send Email.
-
Select the Email Template you want to use.
-
Select the sender.
-
Select Send.
When using the Send Email option from the Longlist tab on the Vacancy page, the error reads:
<your org identifier>.vf.force.com refused to connect.
This is likely because of the session clickjack settings for your org. To fix the issue:
-
In your org, go to Setup and in Quick find, enter Session Settings.
-
On the Session Settings page, scroll down to the Clickjack Protection section:
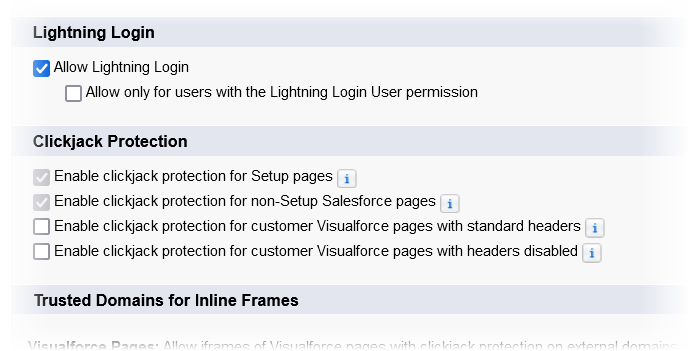
By default, the settings are as follows:
Field Default value Enable clickjack protection for Setup pages Selected Enable clickjack protection for non-Setup Salesforce pages Selected Enable clickjack protection for customer Visualforce pages with standard headers
Not selected Enable clickjack protection for customer Visualforce pages with headers disabled Not selected -
Check the clickjack protection settings in your org. Decide if they're appropriate for the security level you want to apply.
-
If:
-
Enable clickjack protection for customer Visualforce pages with standard headers
-
Enable clickjack protection for customer Visualforce pages with headers disabled
are already selected or you need to select them:
-
Scroll down to the Trusted Domains for Inline Frames section
-
Select Add Domain
-
Add the domain name:
*.vf.force.com
-
Select Save & New
-
Add the domain name:
*.lightning.force.com
-
Select Save
-
Check the trusted domain list includes the two domains you added:
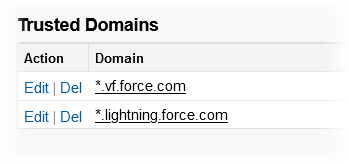
-
or
-
Now use the Longlist to select the candidates you want and select Send Email. The emails will send without error.