You can create a new view by:
- Copying an existing view by saving it under a new name, editing it to make the changes you want.
- Creating a new view from scratch.
Apply filters to views to refine the list of Team Members or candidates included in the view.
Copy an existing view
- At the top of the list page or tab home page hosting the view you want to copy, select the View picklist, and choose the view to form the base for your new view.
-
Select the List View Controls picklist:
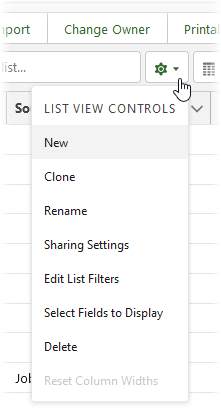
- Select Clone.
Sage People displays the Clone List View dialog:
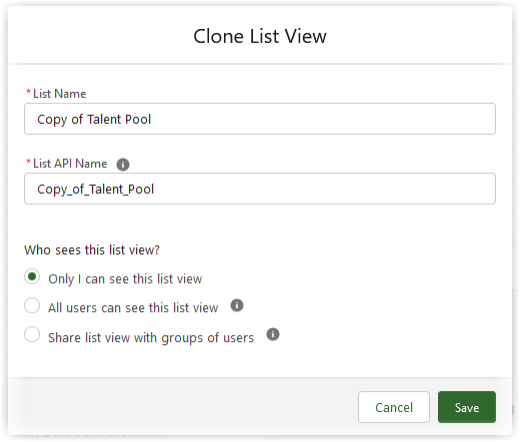
- In List Name enter a new name for your new view.
- In List API Name enter a unique name for the view. The API Name is used internally by Sage People as a unique reference. Typically, enter the List Name with any spaces replaced by underscores.
- Select the radio button to control who can see this view.
-
To make the changes you need to create your new view, select the List View Controls picklist and choose the control option you need:
Option Function Sharing Settings Controls who can see this list view. Sage People displays the radio buttons at the bottom of the Clone List View dialog. Edit List Filters Controls the filters applied to the view. A filter enables you to select items to display based on the value of one or more fields. Select Fields to Display Controls which fields are displayed in this view. - When you have made the changes you need, select Save.
Create a new view
-
Select the List View Controls picklist:

-
Select New.
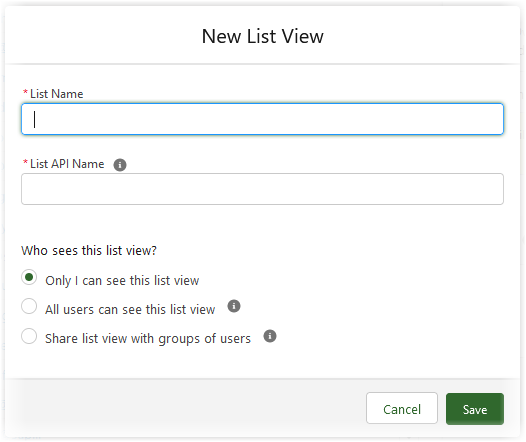
Sage People displays the New List View dialog:
-
In List Name enter a name for your new view.
List API Name is completed for you automatically.
- Select the radio button to control who can see this view.
-
Select Save.
The new view is created with a single field displayed and one filter applied.
-
Select the List View Controls picklist and choose the control option you need.
- When you have made the changes you need, select Save.
The view you created is displayed and added to the picklist of views for you to use again.
Apply View filters
Filters enable you to refine which Team Members or candidates appear in the list.
- Select the Filters
 button to display the filter sidebar.
 -
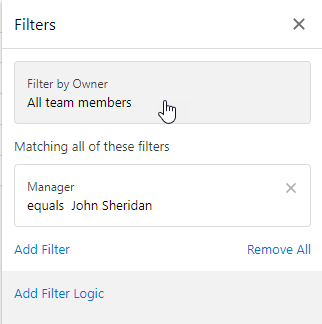
In the Filters sidebar, select Filter by Owner:
-
Select the option you want for this filter. Options available depend on the object:
-
All team members
Select to include all Team Member records in the list view, regardless of the record owner.
-
My team members
Select to include only Team Members where you are the record owner.
-
-
Select Done.
The filter is highlighted in yellow in the Filters sidebar until you save.
-
To add a new filter, select Add Filter:
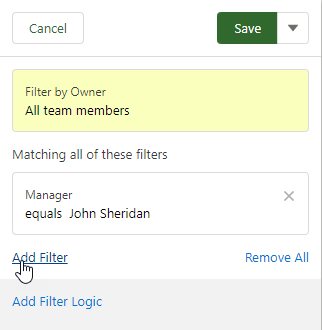
Sage People displays a dialog for new filter details.
-
Complete the details of the new filter. The following example filters Team Members without a photo:
-
Field: Picture
-
Operator: equals
-
Value: leave blank
-
-
Select Done.
-
If you want to delete a filter, select the x in the top right corner. To save the filters, select Save.
-
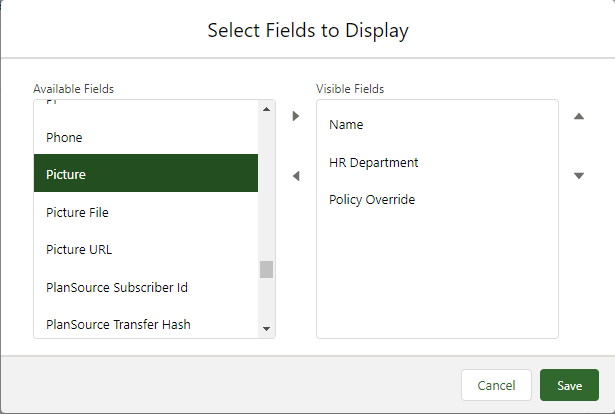
To modify the fields shown in the view, select the List view controls cog and then Select Fields to Display.
Sage People displays the Select Fields to Display screen:
-
On the Available Fields panel, select the fields you want to add and use the right arrow to move them to the Visible Fields panel. Use the up and down arrows to re-order fields. Use the left arrow to remove a field from the Visible Fields panel.
-
Select Save.
Sage People refreshes the list view.