The Recruit Noticeboard enables you to add web formatted text and images to the pages displayed by the Candidate or Agency Portals. Recruit Noticeboard images embedded in Rich Text fields require a sharing rule to enable display.
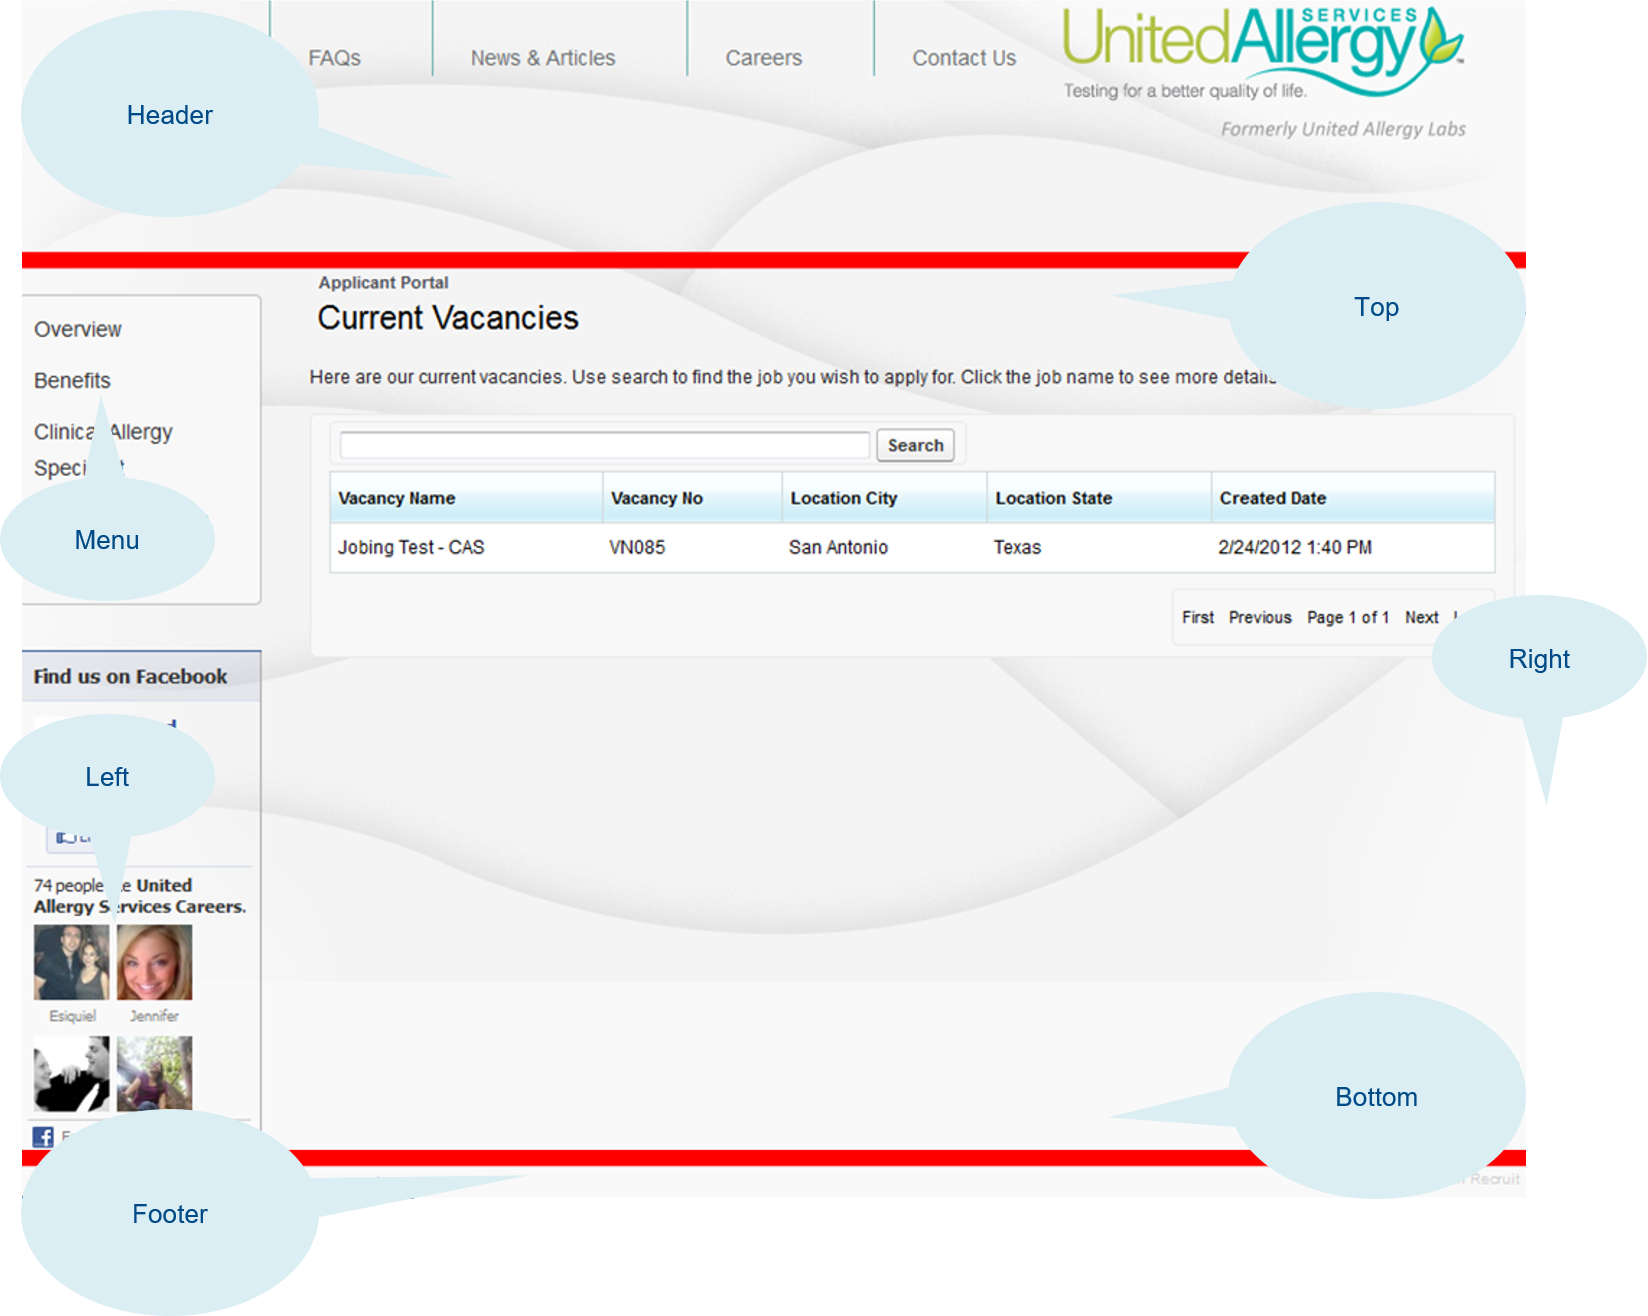
You can add text in six locations:
| Location | Where displayed |
|---|---|
|
Header |
Just below the banner Image, or instead of the banner Image if no banner Image is used. |
|
Footer |
At the very bottom of the page. |
|
Top |
Immediately after the section with the name of the page. |
|
Bottom |
Below all other elements at the bottom of the central panel. |
|
Left |
Below the menu in the left column. |
|
Right |
In a right column. This column automatically opens if text is provided for it. |
You can also add text to the left menu by completing the Menu field when creating a new notice.
To enter text for the Recruit Noticeboard:
- Select the Recruit Noticeboard tab.
Sage People displays the Recruit Noticeboard Home page:
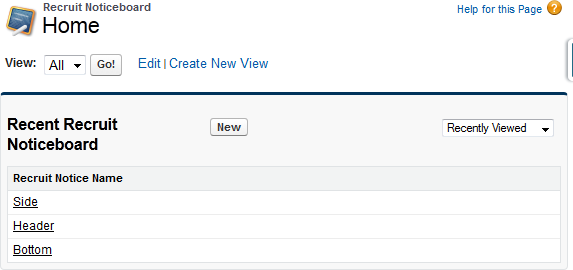
- Select New to create a new notice.
Sage People displays the New Recruit Notice page:
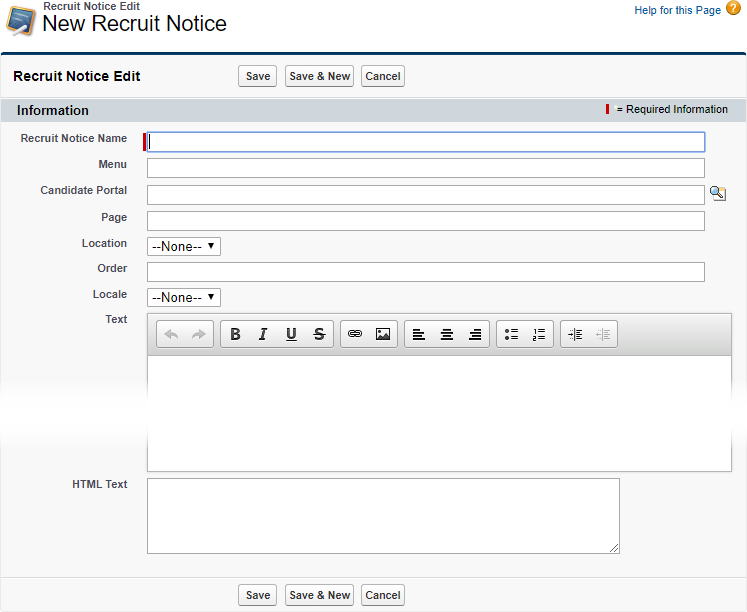
-
Complete the fields as follows:
Notice field
Description
Recruit Notice Name
A name for this notice. Enter a name to help you find the page.
Menu
Text to add to the left menu. Enter up to 128 characters.
To make the menu item active - so that selecting the menu item displays another page - include the Visualforce page name in the Page field.
You can add a menu item as the only entry on a Notice, or as part of a Notice adding content in another location.
Candidate Portal
The name of the Candidate Portal or Agency Portal to host this notice.
Select Candidate Portal Lookup
 to find and select the Portal.
If you have a single Candidate Portal using the default configuration settings, leave this field blank.
Locale
Picklist. The range of locales available for your organization. Selecting a locale displays local language field labels defined for that locale.
Select the picklist and choose the code for the locale.
Page
The name of the Visualforce page to host the text. For example: Apply, or ApplyJobList. If left blank the notice is included on all pages in the Portal. This is an easy way to add your own banner layout to the portal beyond that of the banner Image and stylesheet.
If you are using this Notice to add a menu item, enter the name of the page to display when the menu item is selected.
Location
Picklist. The location within the page to display the text. Select the picklist and choose from:
-
Header
Immediately below the banner Image. If there is no banner Image, instead of a banner Image.
-
Footer
At the bottom of the page.
-
Left
Below the left menu
-
Right
In the right column. A column opens automatically if you enter text for it.
-
Top
Immediately after the section with the name of the page.
-
Bottom
At the foot of the central panel, below all other elements in that panel.
Order
Number. If there is more than one notice for a given page and location, they are sorted by this number. Otherwise ignored.
Text
The text, Images and links you wish to add to the page. Enter up to 32768 characters.
Complete either Text OR HTML Text. If you complete both fields, HTML Text takes precedence and Text content is not displayed.
HTML Text
HTML tagged text to display in the selected location on the page. Enter up to 32768 characters.
Complete either Text OR HTML Text. If you complete both fields, HTML Text takes precedence and Text content is not displayed.
-
-
Select:
- Save to apply the notice and close the edit page.
- Save & New to save the notice and create another.
- Cancel to discard your changes and return to the Recruit Notice Home page.